How to find a transaction hash (TxID) and its link in a block explorer
If you paid for an order by a transfer to a crypto address and the order stays in “Waiting for payment” for a long time, support will ask for the transaction hash (TxID) or its link in a block explorer. The hash is the number of your transfer on the network: it shows the amount, the addresses and the status. It gives no access to your wallet, so it is safe to send.
Way 1. Through the wallet app
The quickest way: in most wallets a transfer has a button that opens it in an explorer.
Open the transfer in the wallet’s history
Open the wallet you paid from, go to the history and tap the transfer.
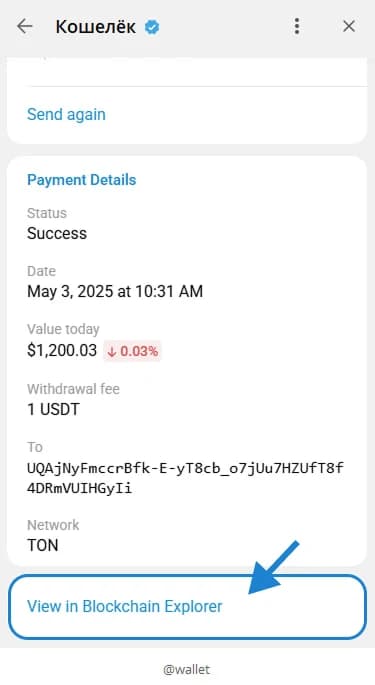
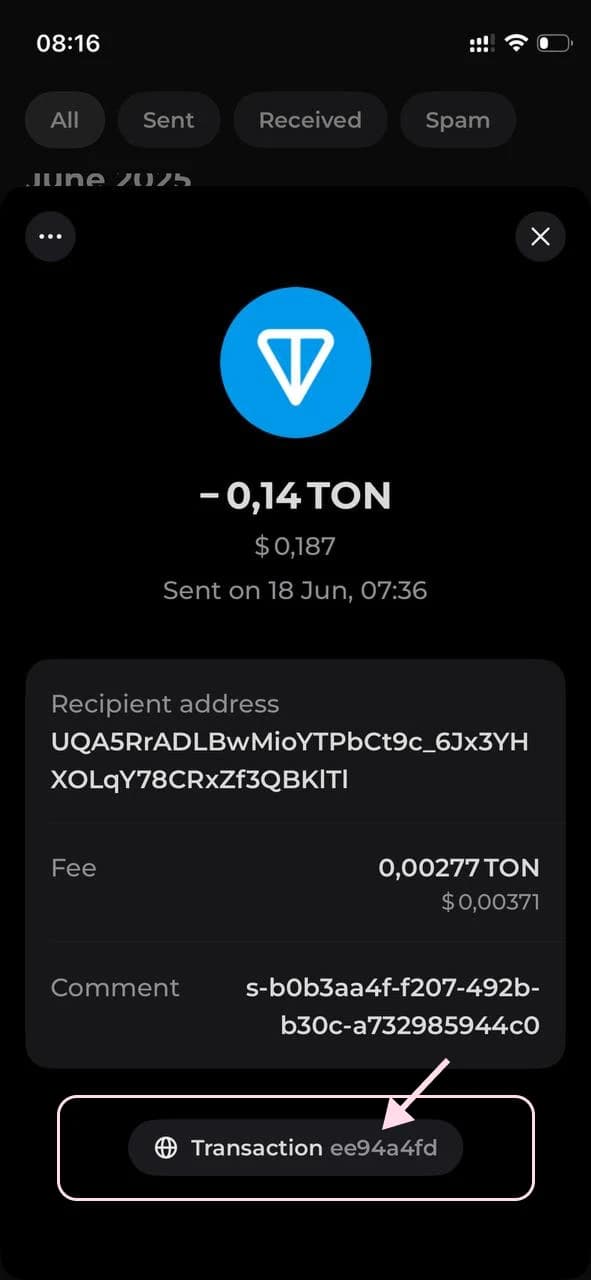
Tap the explorer button
Scroll the transfer’s details down. In Wallet in Telegram it is the “View in Blockchain Explorer” button, in Tonkeeper the “Transaction” button with the start of the hash.
Copy the link from the address bar
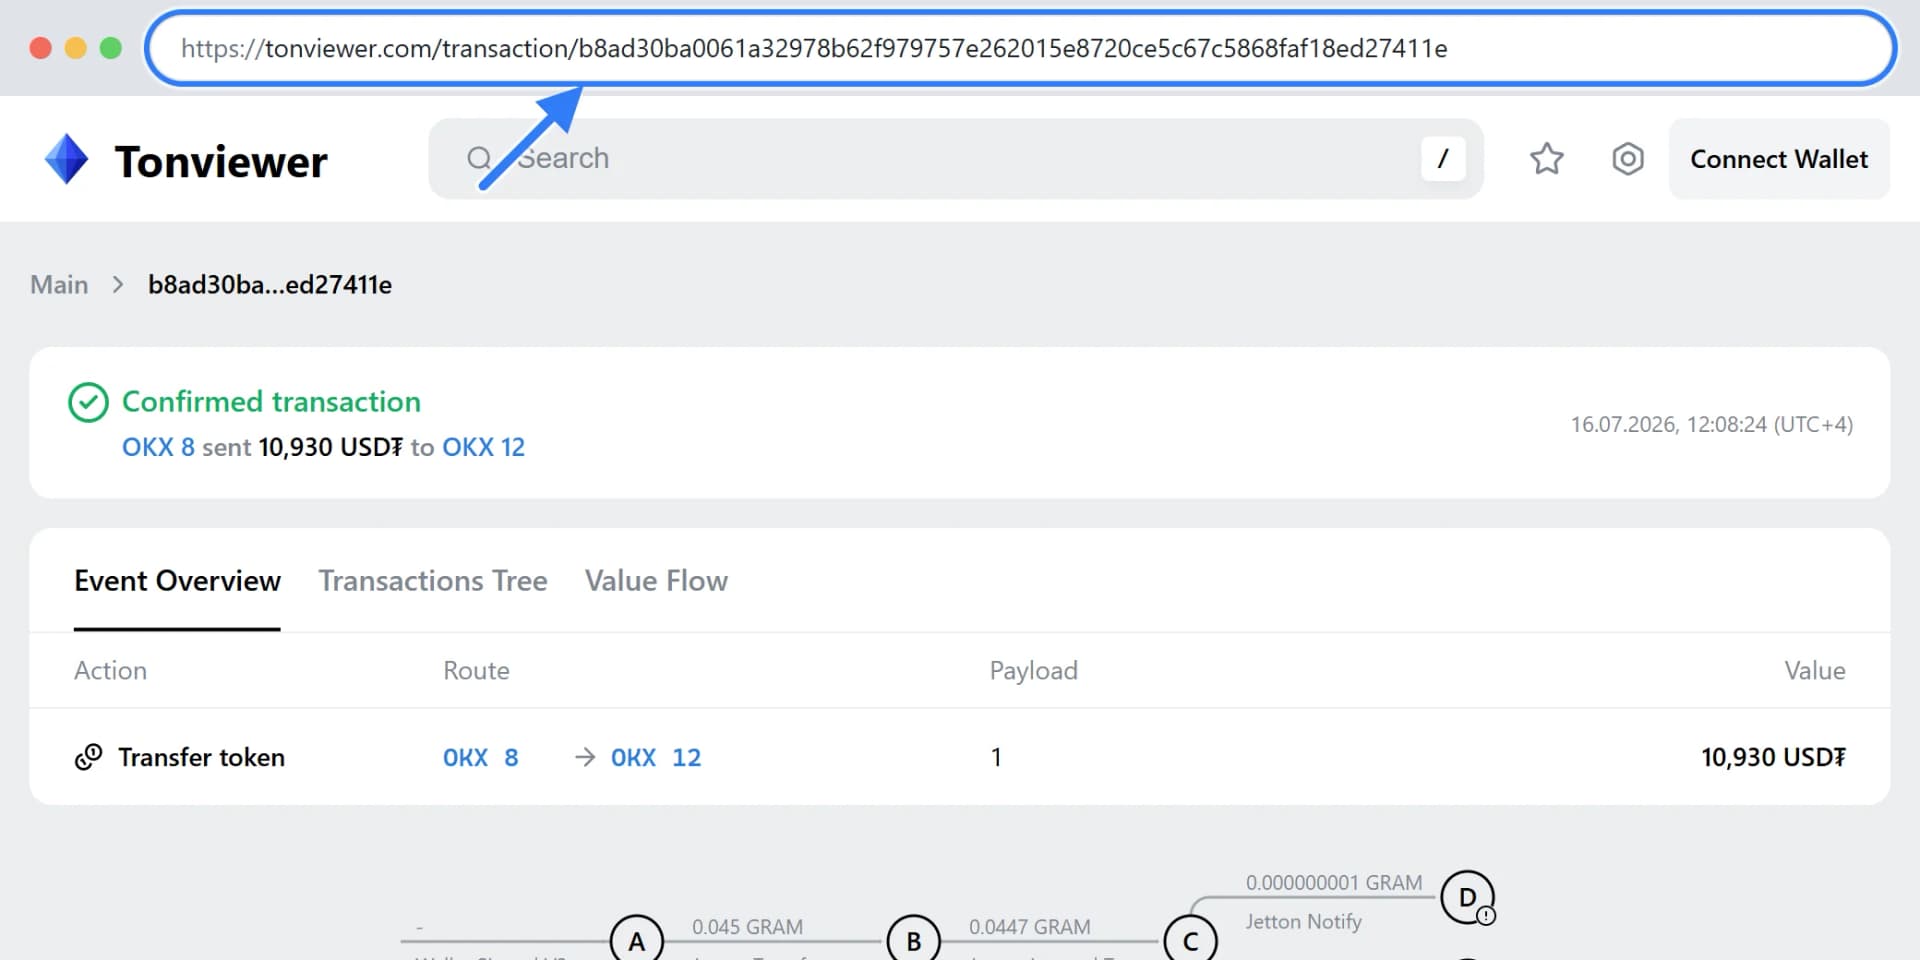
The transfer’s page opens in the explorer. Its address is the link to the transaction, and the long string at the end of it is the hash. Copy the whole address and send it to support.
In other wallets and on exchanges the way is similar: history → the transfer → a TxID, Hash or Transaction ID line, or a link to the explorer.
- Binance, website: Wallet → Overview → Transaction History, the TxID column. In the app: Wallets → Spot → Transaction History → the transfer.
- MetaMask: the Activity tab → the transfer → Copy transaction ID or View on block explorer.
- Trust Wallet: the coin → History → the transfer → View on block explorer.
With a withdrawal from an exchange the hash appears when the exchange sends the transfer to the network. Binance says this normally takes up to an hour. Until there is a hash, the transfer has not left yet.
Way 2. A search by wallet address: the TON network
If the wallet has no such button, the transfer can be found by hand. Below is a real USDT transfer on TON; the example uses a public address of the OKX exchange.
Paste the wallet address into the explorer’s search
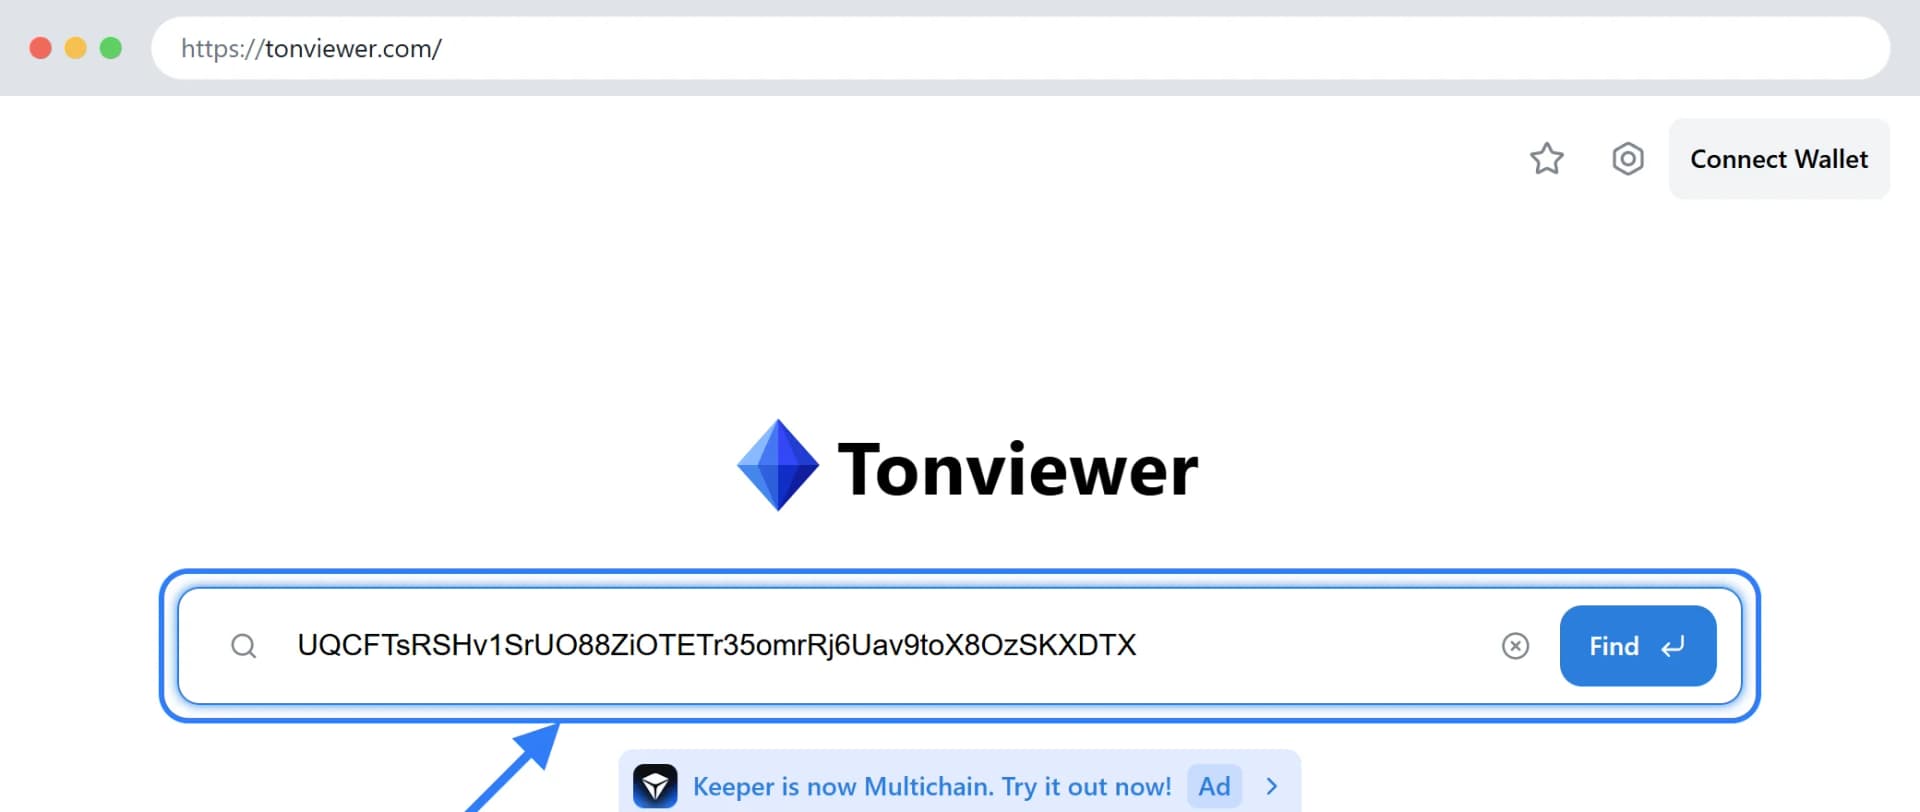
Copy your address in the wallet — the one you sent from. Open tonviewer.com, paste the address into the search field and press Find.
Find the transfer in the history
The address page shows the history. Find your transfer by its date and amount: sent ones are marked “Send token” or “Sent”, with a minus before the amount. Click the row.
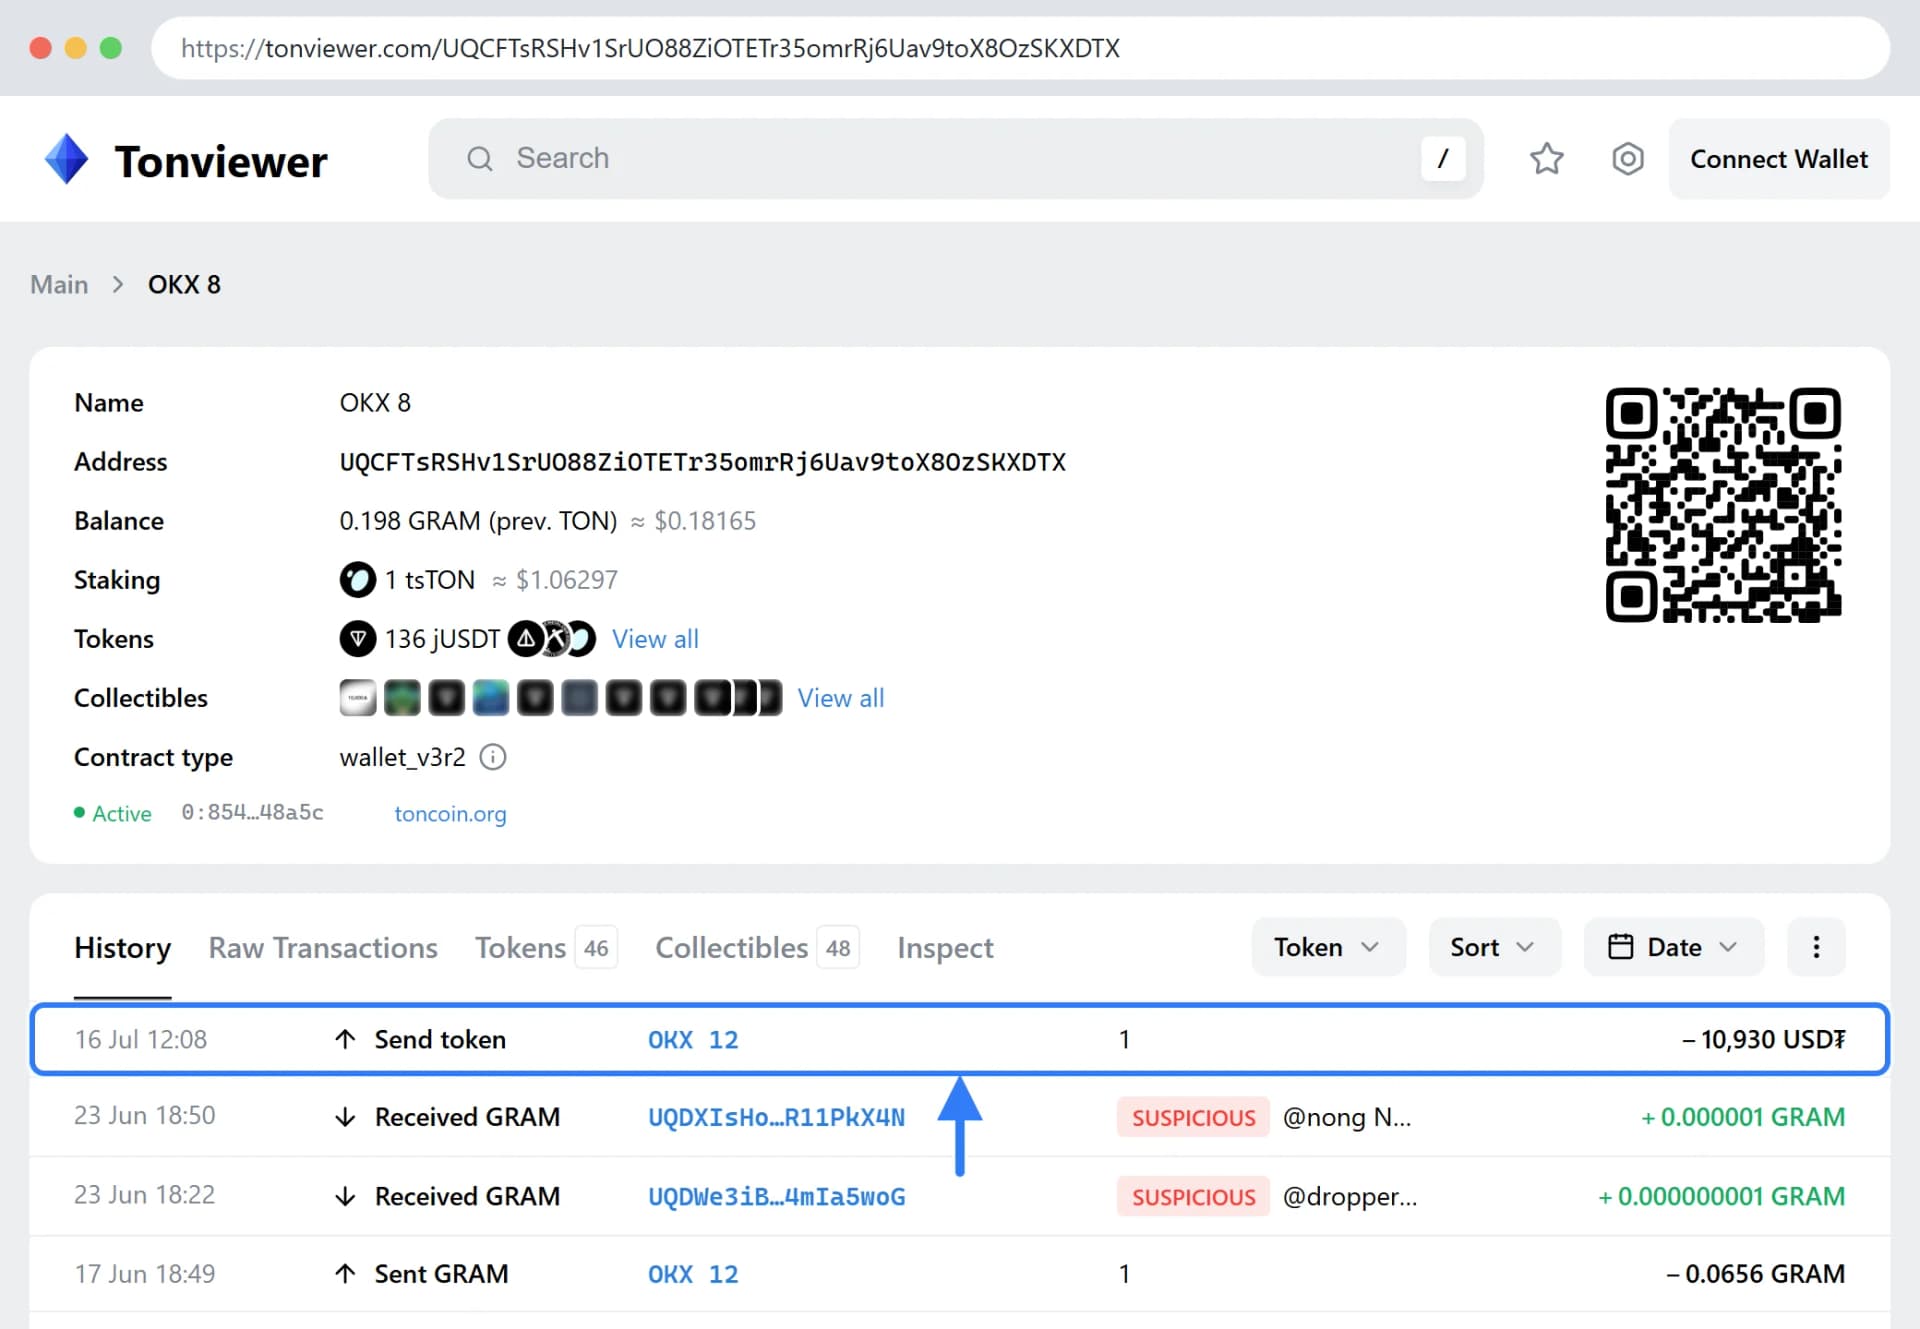
Check the status and copy the link
The transfer’s page should say “Confirmed transaction”: the transfer has arrived. Copy the page’s address from the address bar — that is the link to the transaction; send it.
Ethereum, BNB Smart Chain, Polygon and Arbitrum
On these networks the steps are the same and the explorers are built alike. The example is a real USDT (ERC-20) transfer on etherscan.io.
Paste the address into the search
An address on these networks starts with 0x. Paste it into the search field on the explorer’s main page.
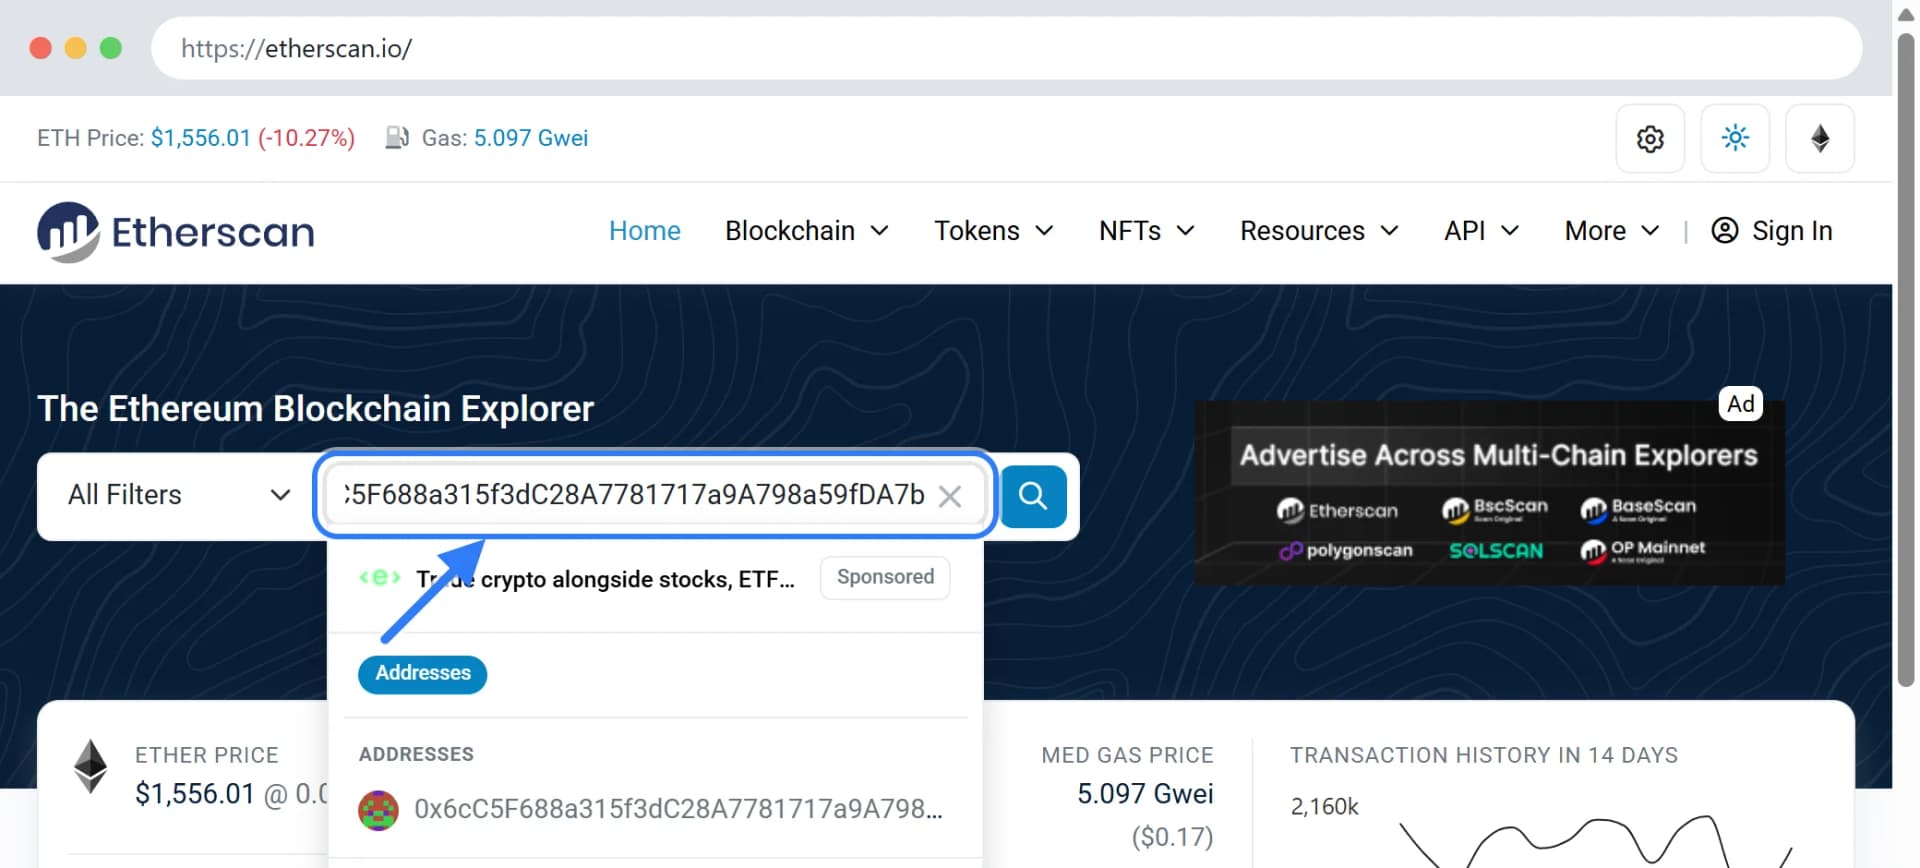
Open the token transfers and find yours
USDT and USDC are tokens, so on the address page you need the “Token Transfers (ERC-20)” tab. Find the transfer by its time and amount and click the value in the Transaction Hash column.
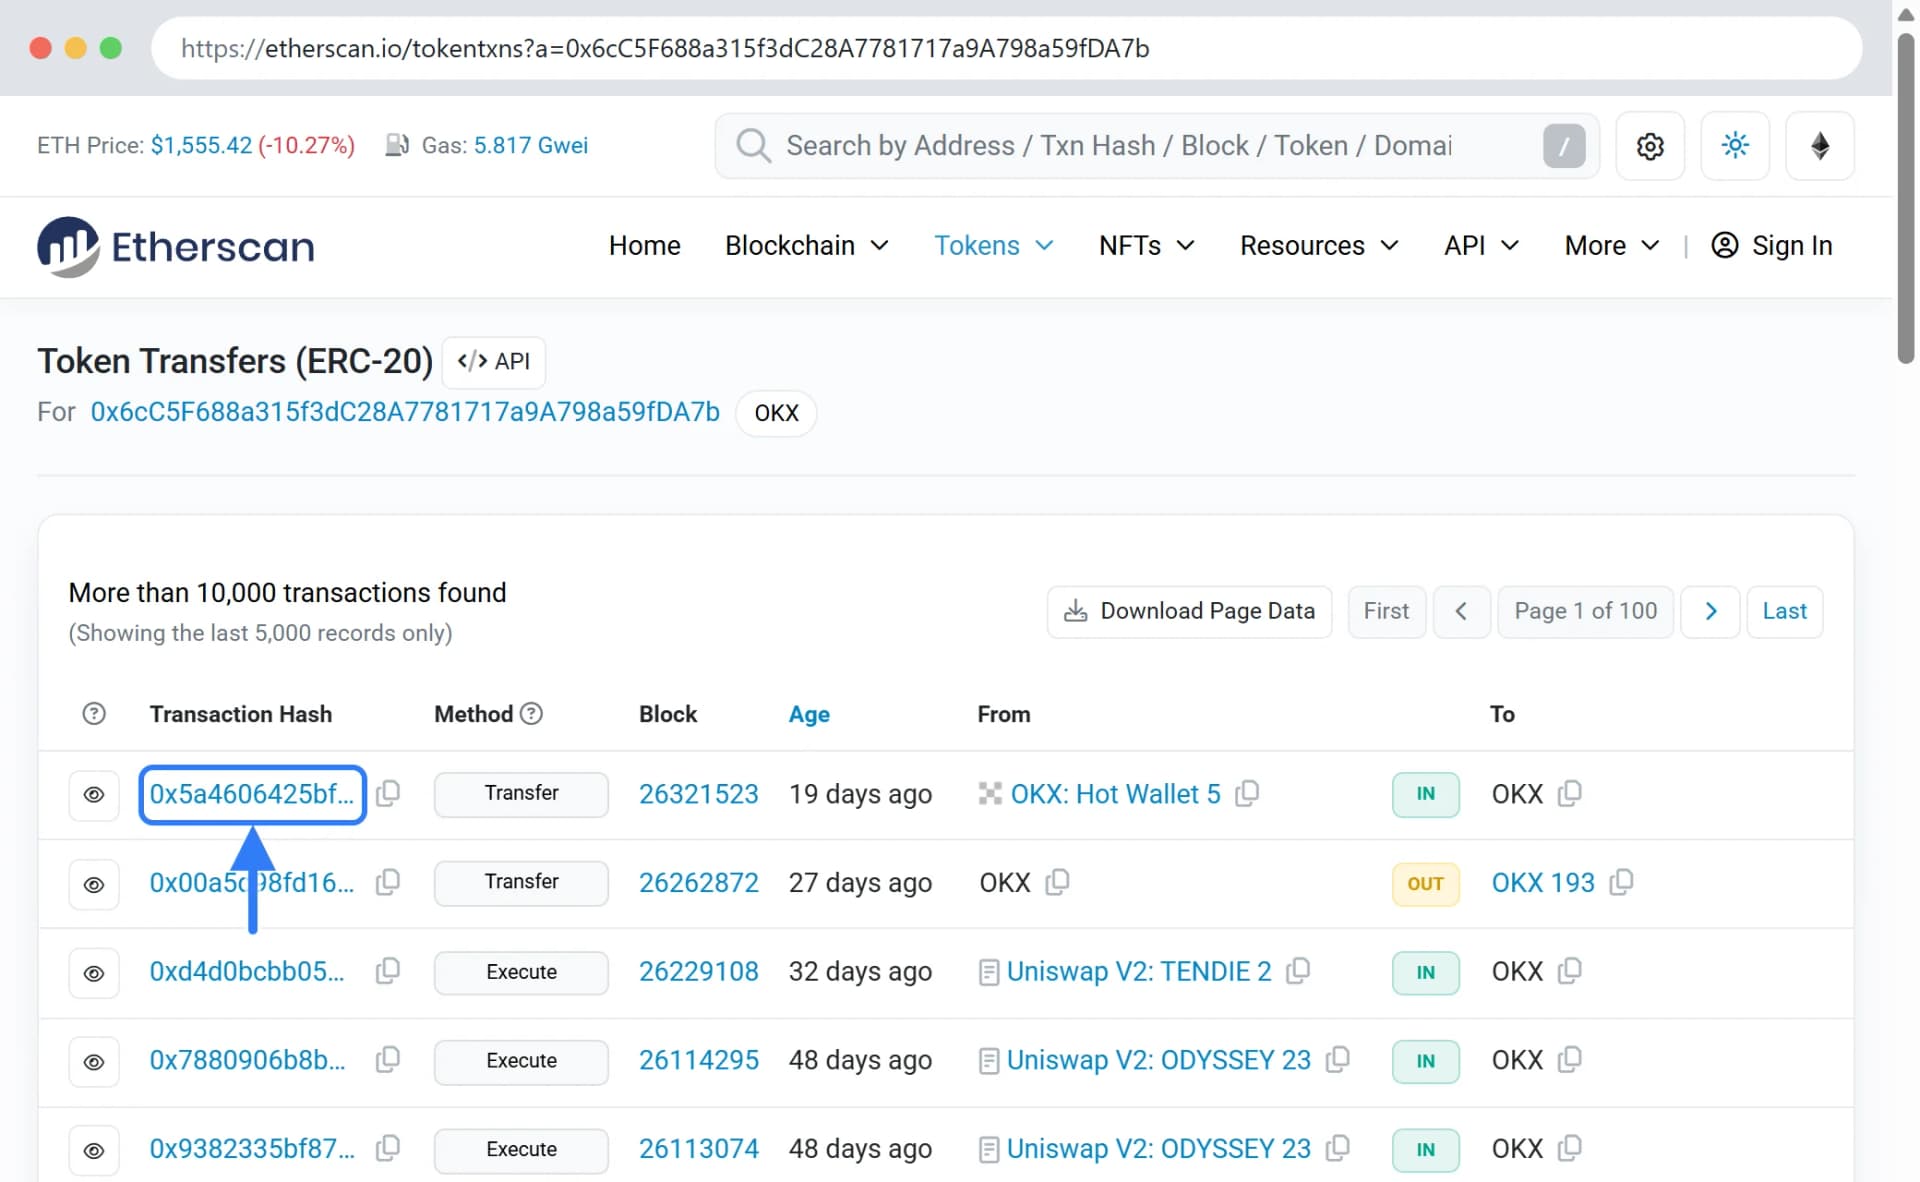
Copy the Transaction Hash
On the transfer’s page the hash is in the first line, with a copy button next to it. The Status line should say Success. You can send support the hash or this page’s address.
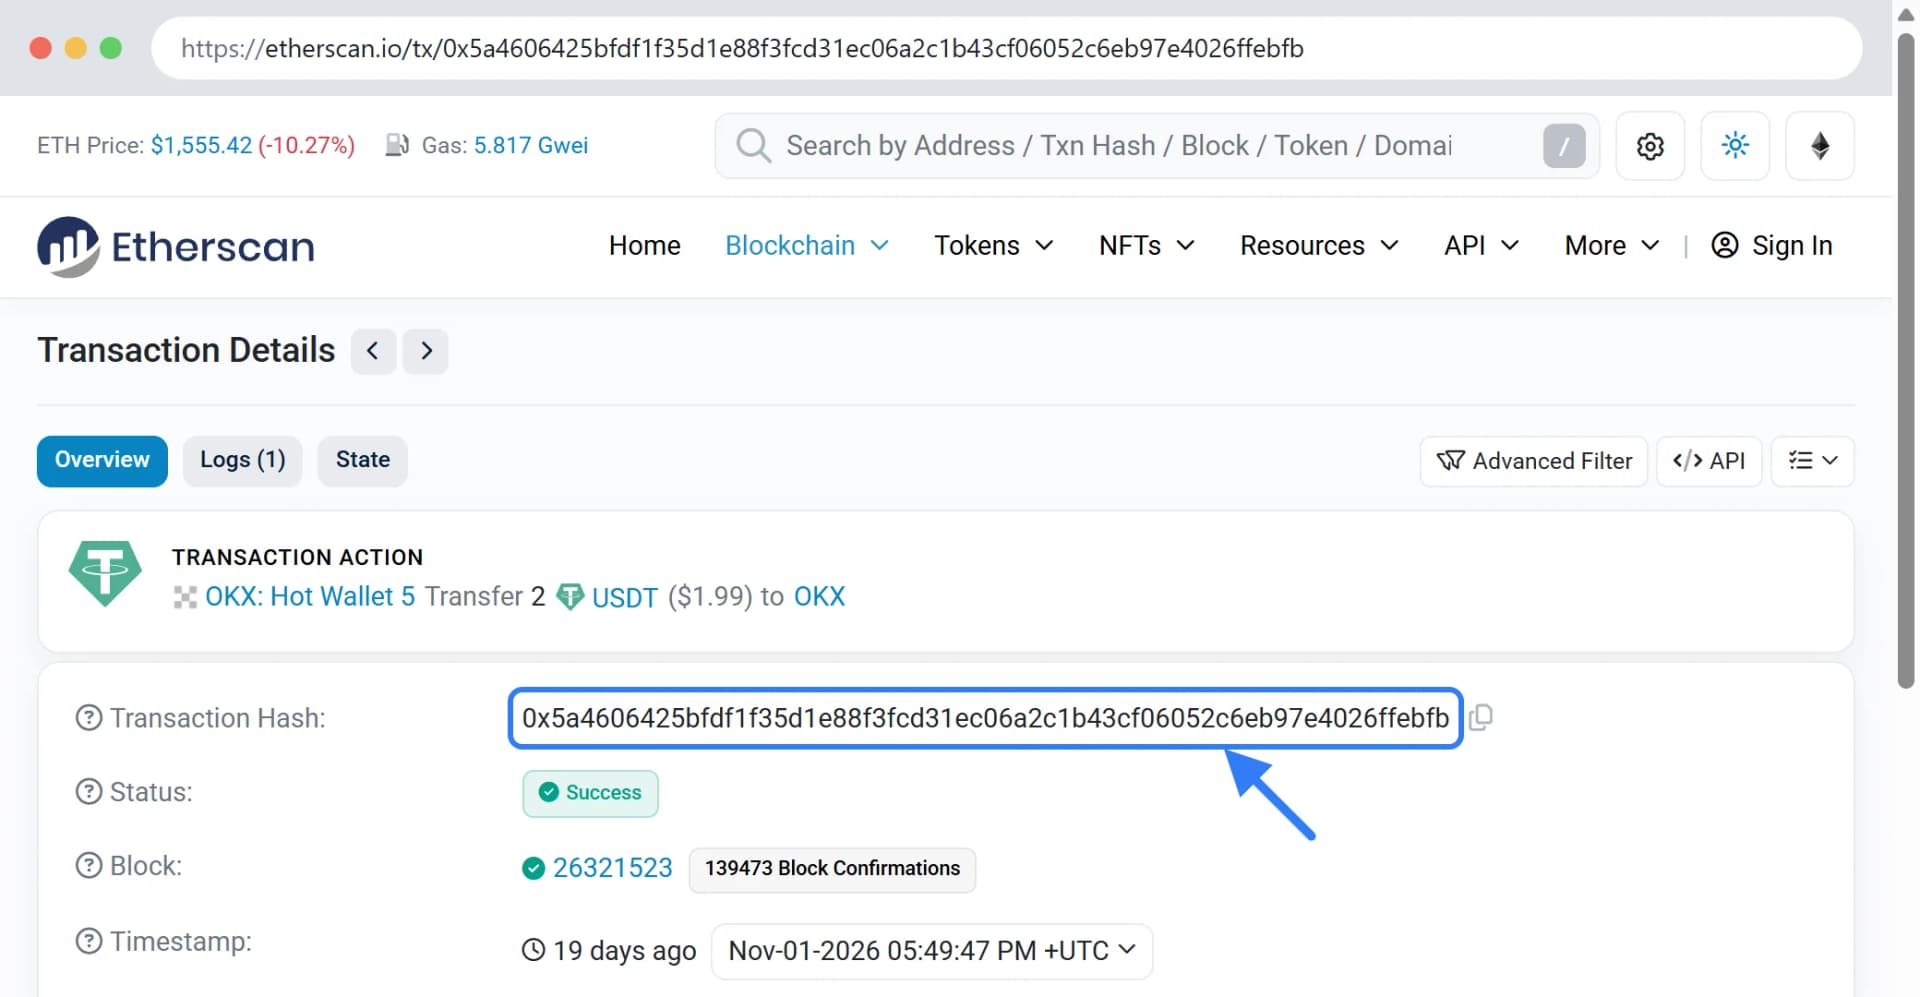
Explorers by network
Use the explorer of the network you sent on. The order is the same everywhere: address → transfer → hash.
- TRC-20 (Tron): tronscan.org
- TON: tonviewer.com
- ERC-20 (Ethereum): etherscan.io
- BEP-20 (BNB Smart Chain): bscscan.com
- Polygon: polygonscan.com
- Arbitrum: arbiscan.io
- Avalanche: snowtrace.io
- Solana: solscan.io
- Bitcoin: mempool.space
What to send to support
- The order ID — where to find it.
- The link to the transaction or the hash as text, not only a screenshot.
- The coin and the network you sent on.
Never send passwords, a seed phrase or private keys to anyone: the hash is all support needs to check a payment.